
Step 7 - Updating your presentation and then updating your presentation running on the remote computer
If you are following this walk through with two different computers, you need to go back to the designer computer so that we can edit your presentation. If you are using one, then you need to switch the RepeatServer.com account login details back to your first account, the one with administrator privileges.
ONLY IF YOU ARE USING THE SAME COMPUTER
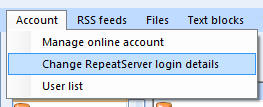
1. You need to change from the read-only RepeatServer.com account and enter your details for your original account. Go back to the 'Repeat Server' tab on the main Repeat Signage screen, then click on 'Account' then 'Change RepeatServer login details':
and then enter the email address and password into these boxes:
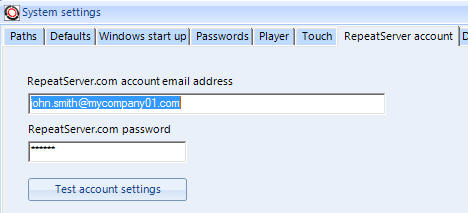
and click on the 'OK' button. You will then be returned to the Repeat Server tab.
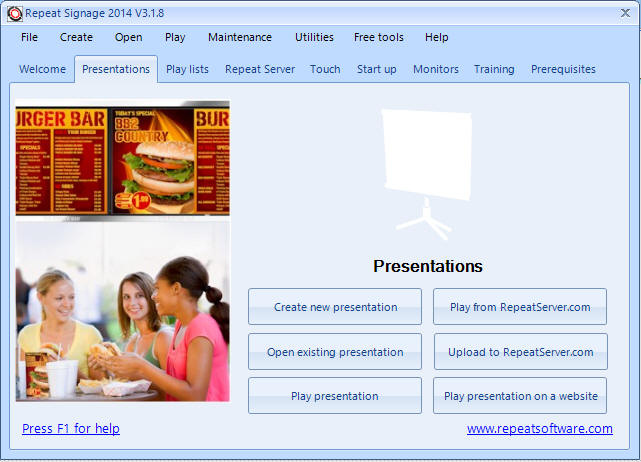
2. On the main Repeat Signage screen, go to the Presentations tab and click on the 'Edit presentation' button:
3. Browse for and find our 'ShopAdvert.rsp' presentation and then click on 'Open' to open the presentation in the designer:
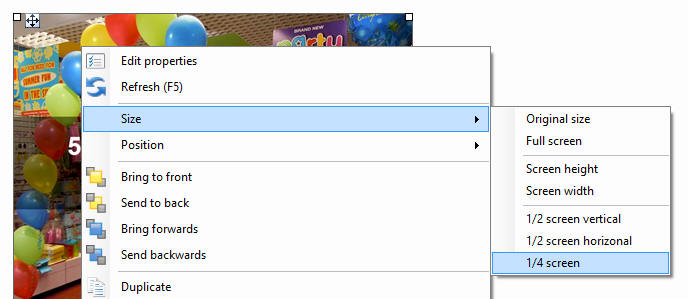
4. Let us start by resizing our picture in the middle of the presentation. Right mouse click the picture and select 'Size' then '1/4 screen:
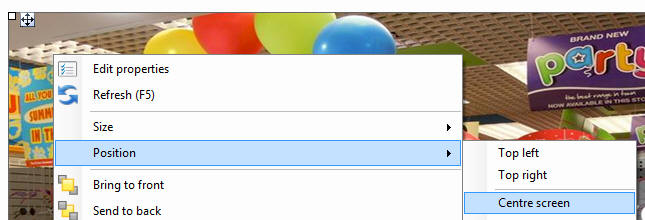
5. Then centre the picture by right mouse clicking the picture again and selecting 'Position' then 'Centre screen':
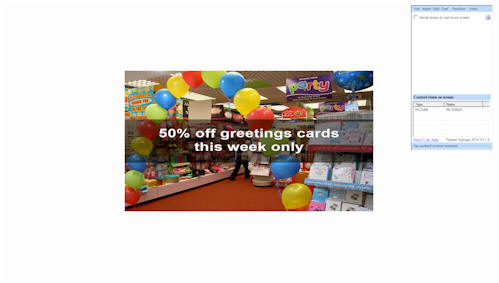
which will look like:
Note - The screen wrote this walk through on was wide screen. If your computer screen is non-widescreen it will look a little different.
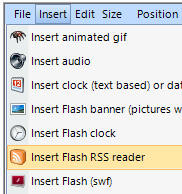
6. We will now add an RSS control to screen so that we can scroll news across the bottom of the screen. On the menu click on 'Insert' then Insert RSS reader':
7. Select 'RSS SCROLLER 02' then select the 'Where is your RSS feed' RepeatServer, then select 'news.xml' option:
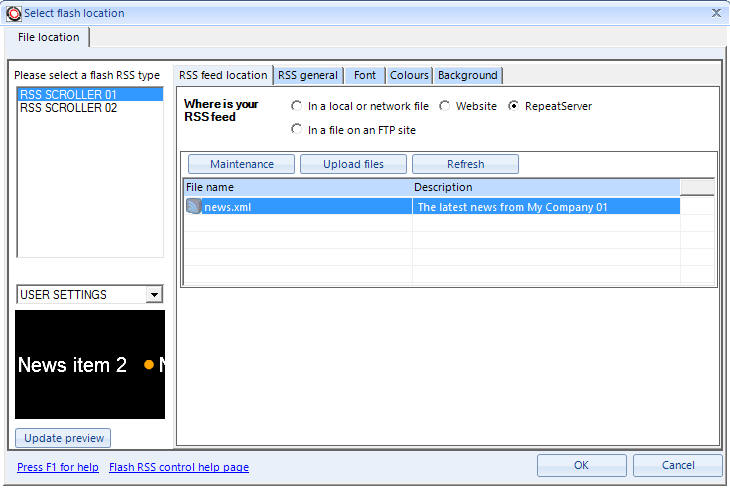
news.xml is the default news feed created automatically when you create a RepeatServer.com account. An RSS news feed is a list of items of news. We are going to scroll these along the bottom of the screen to give customers information. You can change this news.xml file by logging into RepeatServer.com and when you add new items of new and publish, it will change automatically on any presentations displaying it. This is a really easy way to remotely update a screen.
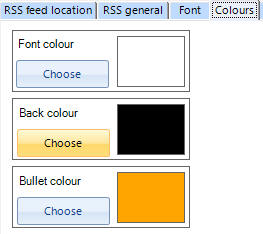
8. Click on the Colours tab and then on the 'Back colour' section, click on the 'Choose' button:
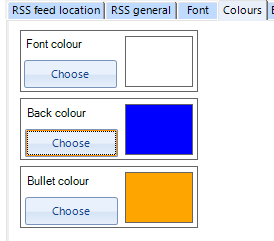
9. On the 'Background colour' screen that is displayed, click on the 'Choose' button and then select the blue colour from the list:

and click on 'OK' and then 'OK' again to close down these screens which will return you to the original screen, but now with the background colour in blue:
and click on 'OK' again to add your control to the screen.
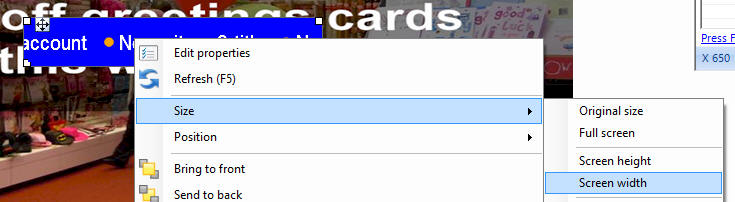
10. Right mouse click the new control, then select 'Size' then 'Screen width':
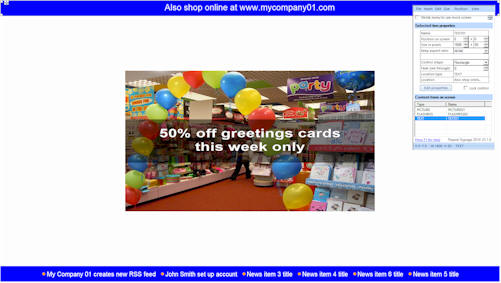
11. Click and hold you mouse on the RSS control and then drag it down to the bottom of the screen and release the mouse button to move it. You presentation should then look something like this:
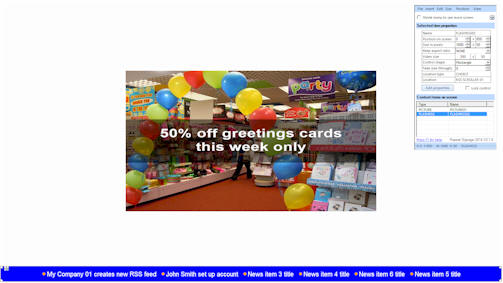
It depends on the width of your screen as to whether the news items are scrolling or still. This control only scrolls the items if they cannot be shown all at once.
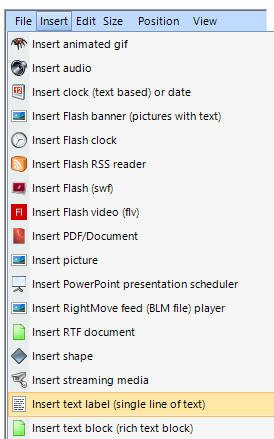
12. On the menu, click on 'Insert text label':
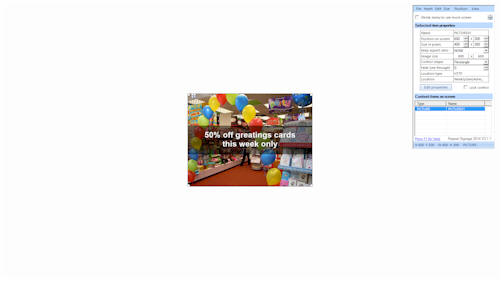
and then type in 'Also shop online as www.mycompany01.com':

and click on 'OK' to add your new Text label control to the screen.
13. Now resize this control by right mouse clicking it, selecting 'Size' and then 'Screen width'.
14. Double click the control to open the 'Properties' screen and select the colours tab:
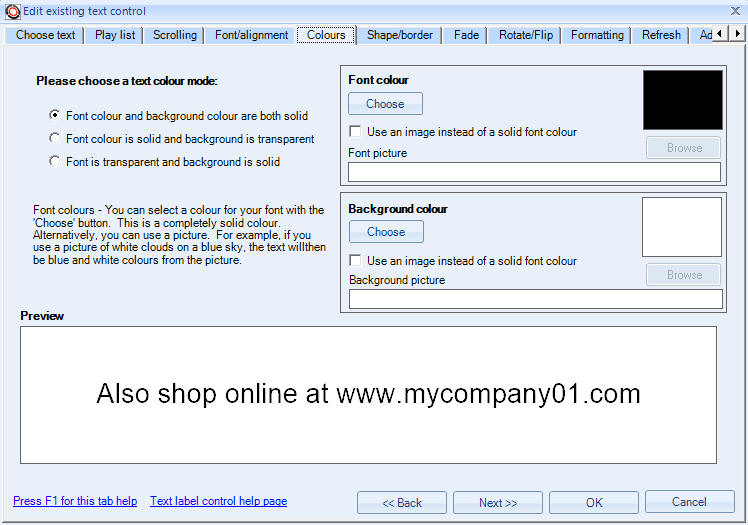
15. Test time. In step 9 you changed the background colour to blue. Use the 'Font colour' Choose button to change the colour to white and the 'Background colour' Choose button to change the background colour to blue. When you are finished it should look like this:
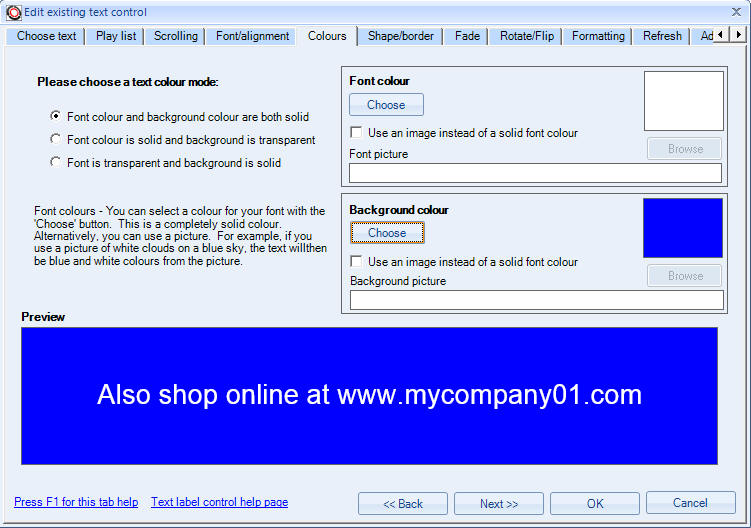
then click on the 'OK' button.
16. Click on your new control, hold down the left mouse button, drag this control to the top of the screen and release the mouse. Your final presentation should look something like this:
17. Save your changed presentation, by on the menu clicking on 'File' then 'Save'. Then click on 'File' then 'Exit' to close the designer and return you to the main Repeat Signage screen.
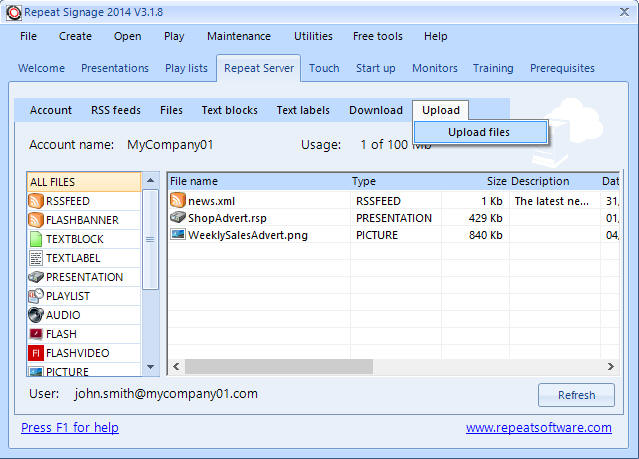
18. Go back to the 'Repeat Server' tab and click on 'Upload' then 'Upload files':
We are going to upload your changed presentation to RepeatServer.com. These are the same sets as in the Step 4 page:
19. This will display the upload website page from RepeatServer.com (automatically logging you in):
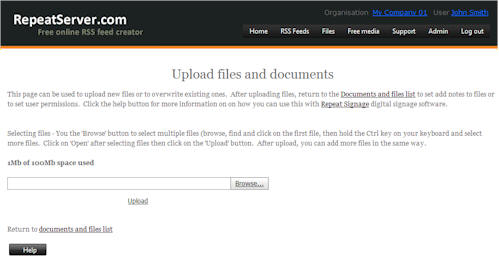
20. Click on the 'Browse' button and find and select your ShopAdvert.rsp presentation from your hard disk and then click on 'OK'.
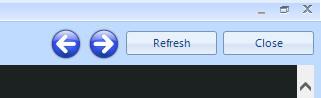
21. This will show you the upload progress. When finished, return back to Repeat Signage but clicking on the 'Close' button in the top right corner of the page:
and then you are returned to the 'Repeat Server' tab.
22. If are using two computers for this walk through, then your second computer should still being play the original ShopAdvert.rsp presentation. Watch this computer and within a minute you should see it automatically load and play the new version of the presentation.
| Next step | Step 8 |
| Previous step | Step 6 - Setting up a remote computer to play your Repeat Signage presentation |