
Step 5 - Creating an additional user in your RepeatServer.com account
We now have a RepeatServer.com account. We have uploaded a picture to it, created a presentation that uses that picture and then in the last step uploaded our final presentation to our RepeatServer.com account. Our imaginary shop in London will need to access this RepeatServer.com account in order to play our ShopAdvert.rsp presentation. Now someone at our London shop, or a 3rd party IT support company will need your RepeatServer.com account details in order to set this up. We could just give them our email address and password. However, anyone with our email address and password could, if they wanted to, log onto RepeatServer.com and change and delete files, which isn't really what we want. So it would be best if we created another user on our account with read-only access to the files. This is how we do this:
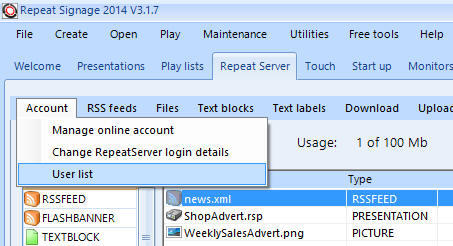
1. In Repeat Signage, click on the 'Repeat Server' tab and select 'Account' then 'User list' from the menu:
This will log you onto your RepeatServer.com account and display your users. In this case this is only you and you are also the only Administrator:
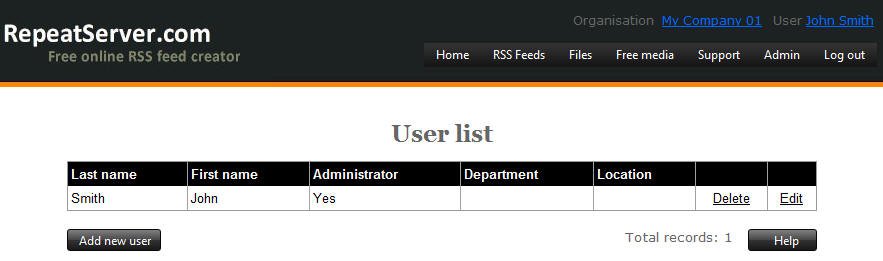
An Administrator user is one that has total control over the account and can create other users and set them access levels.
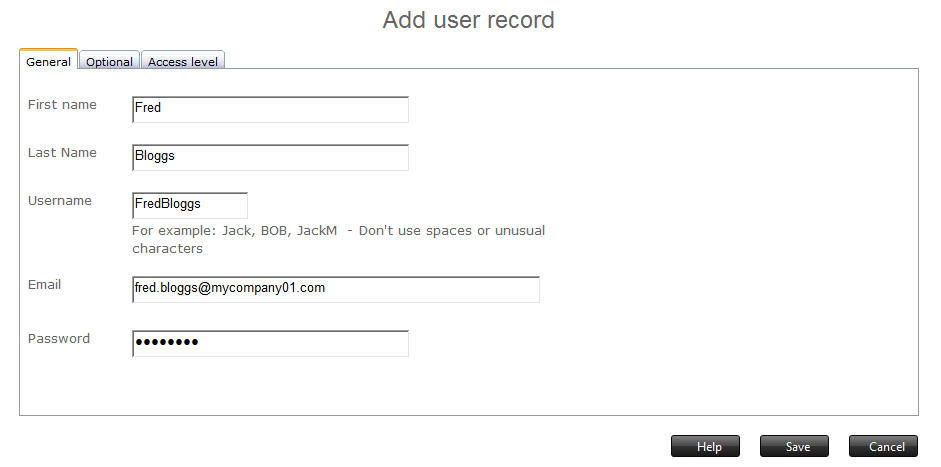
2. Click on the 'Add new user' button and enter the basic details of your new user. You will need to use another name. This user could be called 'Repeat Player' or 'Read Only' or whatever you want this to be called. You will also need to enter another unique email address, but this can just be a made up one such as repeat.player@mycompany01.com. Add a new user:
3. Then click on the 'Access level' tab and change all the drop down lists to be 'READ ONLY':

4. Finally, click on the 'Save' button to save the new user:
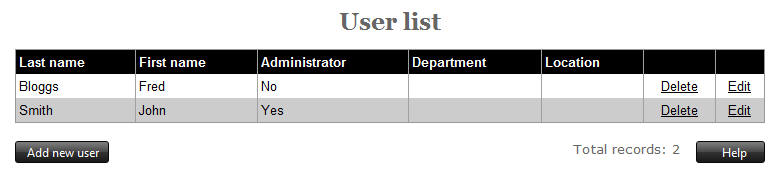
You now have a new user called Fred Bloggs who only has read-only access to your account. You now have an email address and password that you can give to the people in the shop in the London so that they can display your presentation.
| Next step | Step 6 - Setting up a remote computer to play your Repeat Signage presentation |
| Previous step | Step 4 - Uploading your presentation to your RepeatServer.com account |